|
To add a new event press the
"New
Event" button or double click
the empty area inside the viewing area. You can use
shortcuts Ins or Ctrl + N as well. Also you can create a new entry in the
Events area by entering data in the upper row.
To
edit an already existing entry press the "Edit" button or double click the record you want to
edit in the viewing area. Also you can use Ctrl + Enter
shortcut.
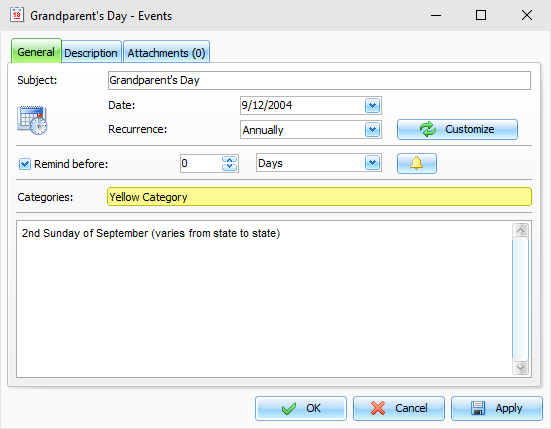
Dialog box for working with
events:

Fields description:
Title - a records title.
Date - event's date.
Recurrence - these settings enable you to make any event a
recurring one. When you change the model or press the
"Customize" button, the extended
recurrence options window opens, giving you an opportunity to
select and set an appropriate recurrence template.
Below
you can see the notification
options:
Remind at - here you can set up date and time when you
would like to get the notification about an event.
To
get access to the Extended notification options, click the
 button to the right of
this field. button to the right of
this field.
Categories - here you can assign one or more categories to
the entry. See "Working with Categories" topic for more
details.
Description
- use this field to enter an
additional event information and its description. The description
field supports rich text formatting (RTF), pictures, tables and
hyperlink insertion. See Working
with text and descriptions topic more for details.
Attachments
- allow to attach any file to the
entry. All attached files will be stored directly in the database.
See "Working with Attachments" topic for more
details.
|