|
The Contacts is
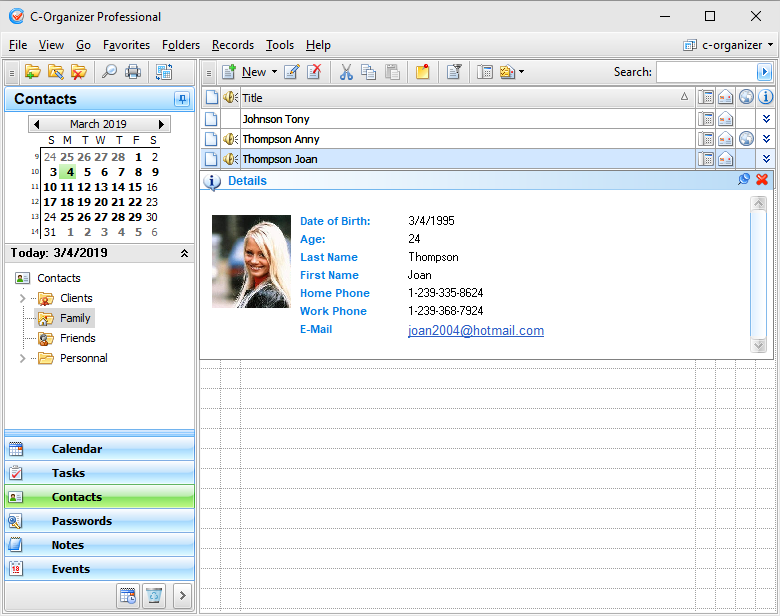
designed to store information about your contacts. There is a
picture storing feature available. Furthermore, it is possible to
store practically any information about a contact person, thanks to
easily configurable database structure for each record.
Besides, the Contacts allow to systematize your
information by placing it into the appropriate folders. The data
inside the viewing area has a tree-like structure.
Moreover you can change a folder picture for
better visualization. Just click the "Folders - Change
Icon" main menu item and
choose one of predefined pictures or load own picture from file.
The picture size is 16x16 pixels.
Use
the "New
Folder" button to create a new
folder, "Rename" button to rename folder, and
"Delete
Folder" button to delete
selected folder. Also you can use the Ctrl+Alt+N, Ctrl+Alt+E and Ctrl+Alt+D shortcuts or the context menu commands in the
Documents tree area.
To simplify the information
grouping process we added Drag & Drop support, so just drag the
contacts or the contacts groups to place them inside folders.
Also you can cut or copy any entry and paste it into other
folder using an appropriate buttons or shortcuts
(Ctrl+X, Ctrl+C, Ctrl+V) or using the context menu in the Contacts
area.
Also
you can drag any contact to the program calendar to create a new
appointment, linked to this contact.
Each
entry has a built-in notification system, which will always remind
you about an upcoming birthday or anniversaries.
You
can filter your entries by category. Just click the
"Filter by
Category" button. In this case
you will see only contacts, which match to the selected
categories.
All
entries in the list can be filled with the first category color, if
this option is on (see the Contacts Preferences).
Besides, in the view area you can see practically
any fields. Just configure the program options and select which
fields do you want to see.
You
can preview information about contact by pressing the following
button:  . .
Furthermore, a contact can be
posted as an electronic sticker on a computers monitor. Just
select a contact and click the "Show as
Sticker" button.
See
the How to preview a record and to work with
stickers topic for more details.
Each entry can be edited directly
in the view area.
The
Contacts integrates automatically with a default Email client and a
web browser, installed on your computer.
By
clicking the  button you can launch a pop-up window which
contains the list of Email addresses a chosen record. Choosing any
of the Email addresses from the list automatically launches an
Email client ready to send a message to the chosen
address. button you can launch a pop-up window which
contains the list of Email addresses a chosen record. Choosing any
of the Email addresses from the list automatically launches an
Email client ready to send a message to the chosen
address.
Also
you can send a message to the contacts group by pressing the
"Send
Message" button
("Tools -
Send Message" program main
menu item).
If
you click the  button, the entire list of Internet addresses
(URLs) for the selected record will open. When you chose any
address, your Internet browser opens it at the set page. button, the entire list of Internet addresses
(URLs) for the selected record will open. When you chose any
address, your Internet browser opens it at the set page.
Also
you can use the Phone
Dialer function to dial phone numbers. Click the
 button to access this
feature. button to access this
feature.
|

