Home
Advanced Diary Online Help Prev Page Next Page
General Information
About Advanced Diary
Features Overview
Installation and system requirements
How to upgrade old versons of Advanced Diary
Interface types and colors
Multilanguage interface
Information about updates
Working with Advanced Diary
Overview
Portable mode
Working with folders
Working with records
Favorites
Multimedia Diary
Attached Files
Manage attachments
Working with Categories
Working with text
Spell-checking and autocorrection
Working with diary templates
How to send an entry by email
How to work with stickers
Advanced Diary - Print
Creating and editing print templates
Previewing and printing report
Program's options
Keyboard Shortcuts
General options
Additional options
Backup options
Text Editor options
Fonts options
Working with databases
Database manager
Search in database
Import
Export
Backup
Restore
How to protect your information by password
Working with Dropbox
Working with Google Drive
Working with OneDrive
Working in a network
Network features overview
Server installation
Connection to a server
Managing users
Assigning entries
Server database maintenance
Copyright and License
Registration
How to order Advanced Diary
Limitations of evaluation version
Technical Support
Technical Support


  Import

Use the Import function to transfer information from various sources to the Advanced Diary database.

To open the Import dialog box, click the "File - Import" program's main menu item.


The Import process consists of a few simple steps.


Import1


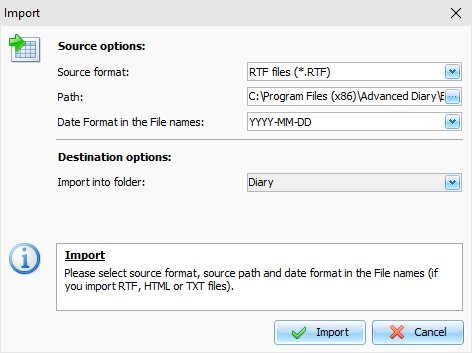
Choose the source format. Advanced Diary supports the following formats:

Rich text files (*.RTF)

HTML files (*.HTM)

Text files (*.TXT)

Advanced Diary Databases (*.DNDB and *.DDB)


Choose source files location.

Choose Date Format in the File names (not necessary if you import database file). For example: if you select "YYYY-MM-DD" format, Advanced Diary will accept "2010-03-12.RTF" or "2010-03-12.TXT" or similar file names.


Note: If you select the "Do not detect date" option, all your entries will be imported into a current date.


Select Destination folder (into which you would import information) and click the "Import" button.

You will see a next window with the import results:
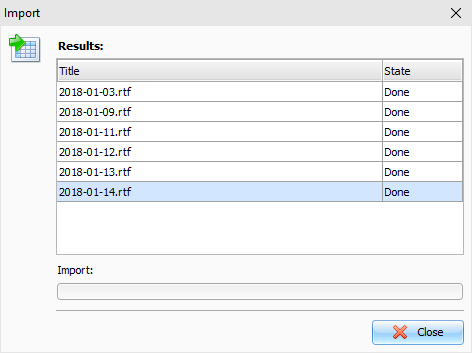
 

Import2


You will get a notification message when the action is complete.


Copyright © CSoftLab. All Rights Reserved.  

Converted from CHM to HTML with chm2web Standard 2.85 (unicode)